Photo Editing with Lightroom and Photoshop
Do you ever look at a scene and think it looks amazing only to find that your camera doesn’t capture what you “see” ? I think this is quite a common frustration with people and this is where post processing comes in to it.
When photographers used film we would take the photos and then send the film off to the lab for the processing and printing and the lab would do their “magic” and create the prints that we would supply our clients. The digital era has changed all of that. As well as actually taking the photographs most photographers do their own post processing to produce the finished print ready file. This has meant an investment in both time and money to get the best possible out of the digital files.
When you take a photograph you have several options on file format. The two most common options are “RAW” and “JPG”. The RAW file captures the sensor data, puts it in to a file and it really is over to you to sort it out. With a JPG file the camera has applied a level of post processing to the data from the cameras sensor and gives you a printable file. The downside of a JPG file is that in the post processing some of the data gets “thrown away” and you can do far less with it afterwards, you are also relying on a camera “knowing” what you wanted the image to look like, what level of noise reduction to apply etc etc and quite often it gets it wrong so along with most other professional photographers I photograph in RAW mode and then process it myself using Adobe Lightroom and Photoshop.
This means I can actually use the data in the RAW file to re-create the image I saw in my head when I pressed the shutter button. I thought this would be best shown with a few examples. So, this first photograph is the un-processed file, just imported in to Lightroom and exported as a JPG file with nothing done to it.
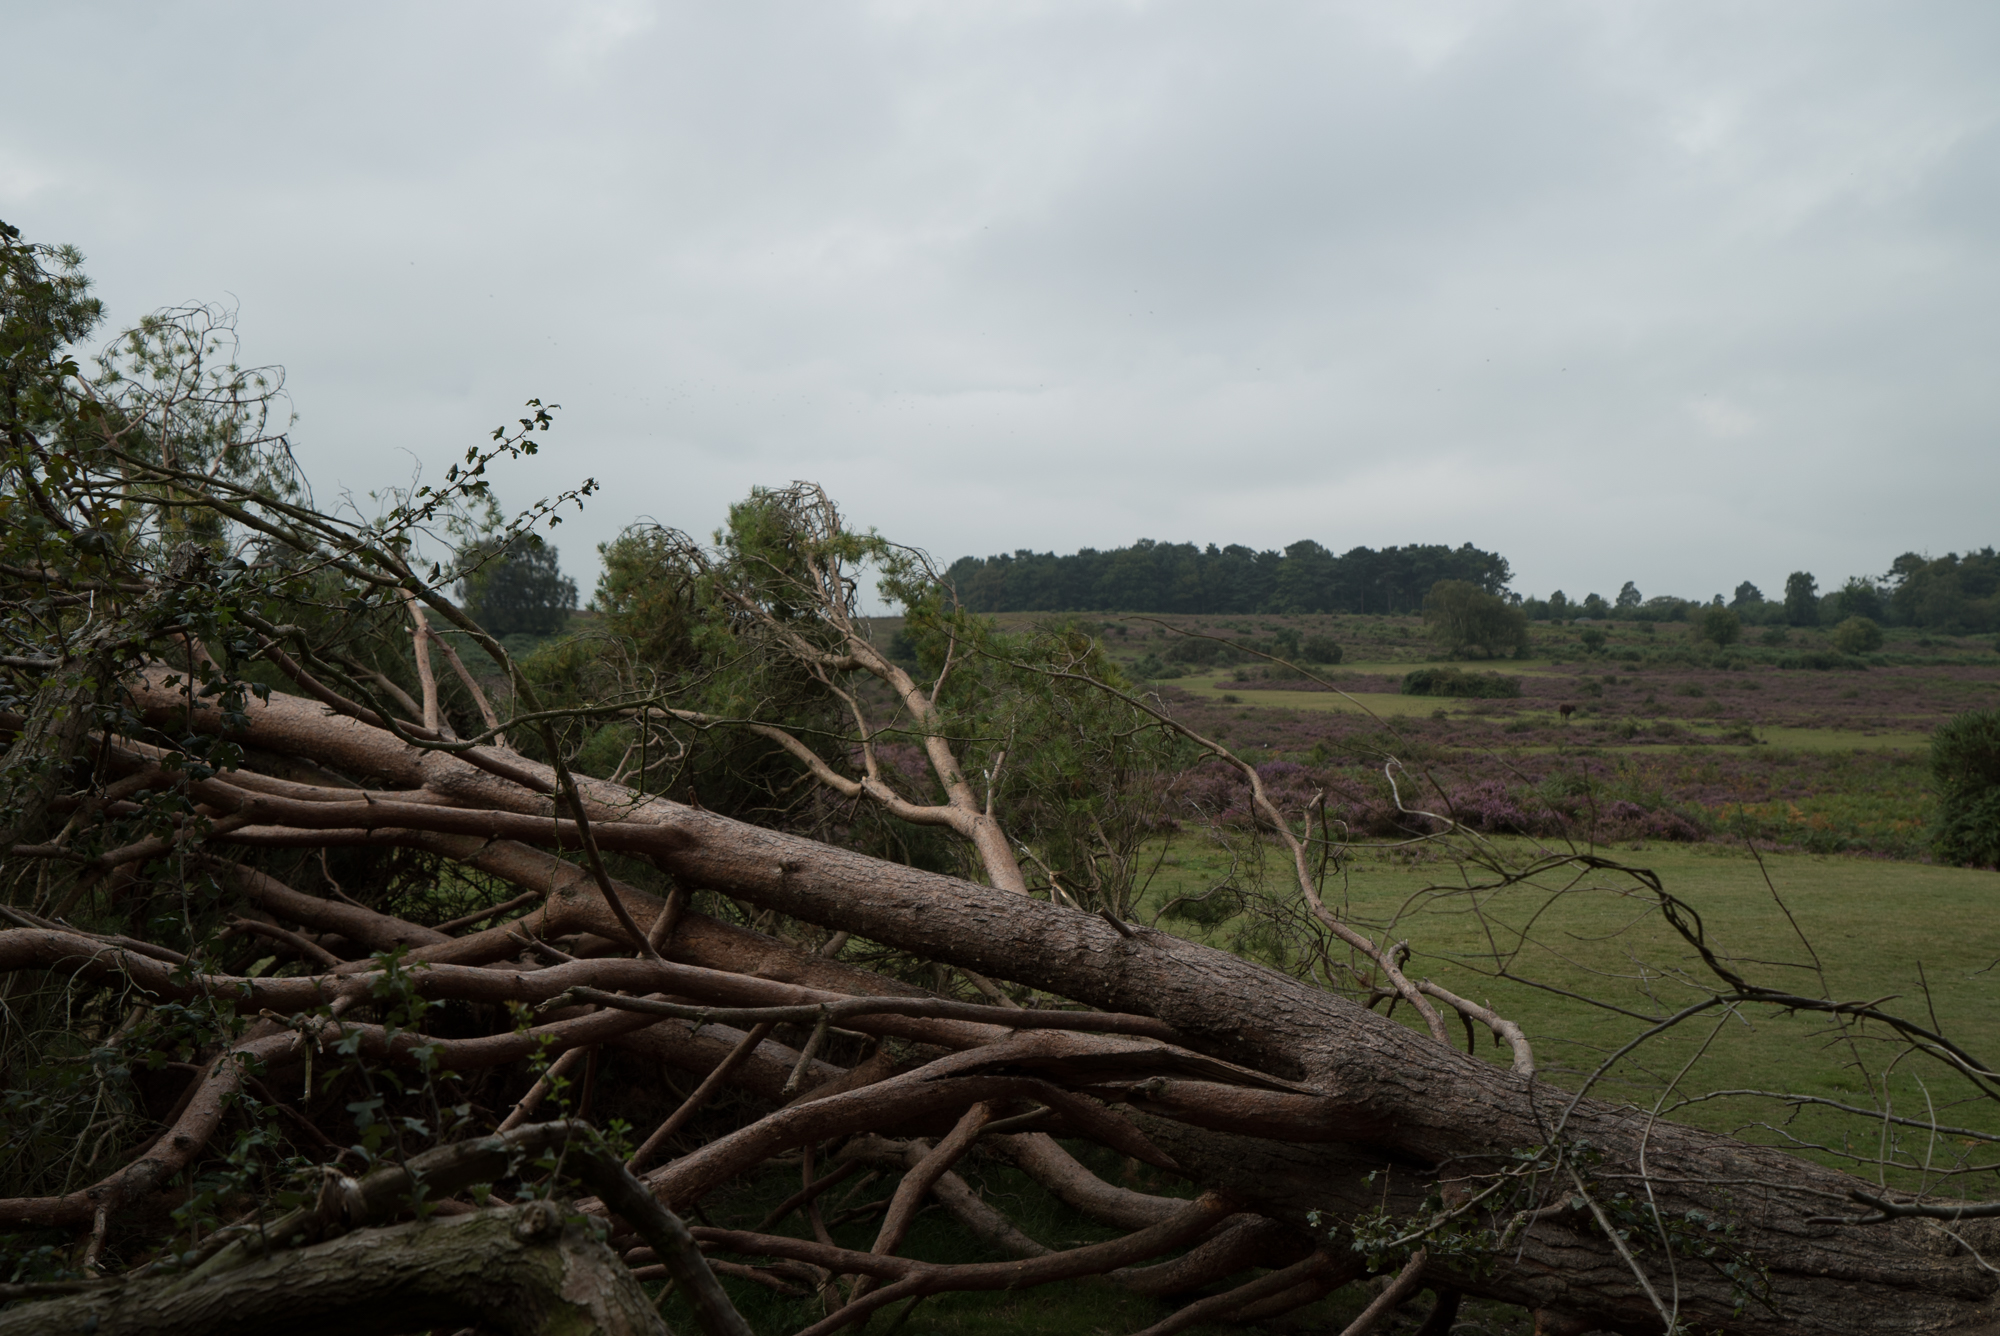
As you can see there is nothing special about this image; just a fallen tree in the New Forest on one of our grey, overcast days. However there is a wealth of data inside the RAW file that can be accessed to make this image more of what I saw in my head…
This next image has been processed in Lightroom only, no photoshop or plugins used….
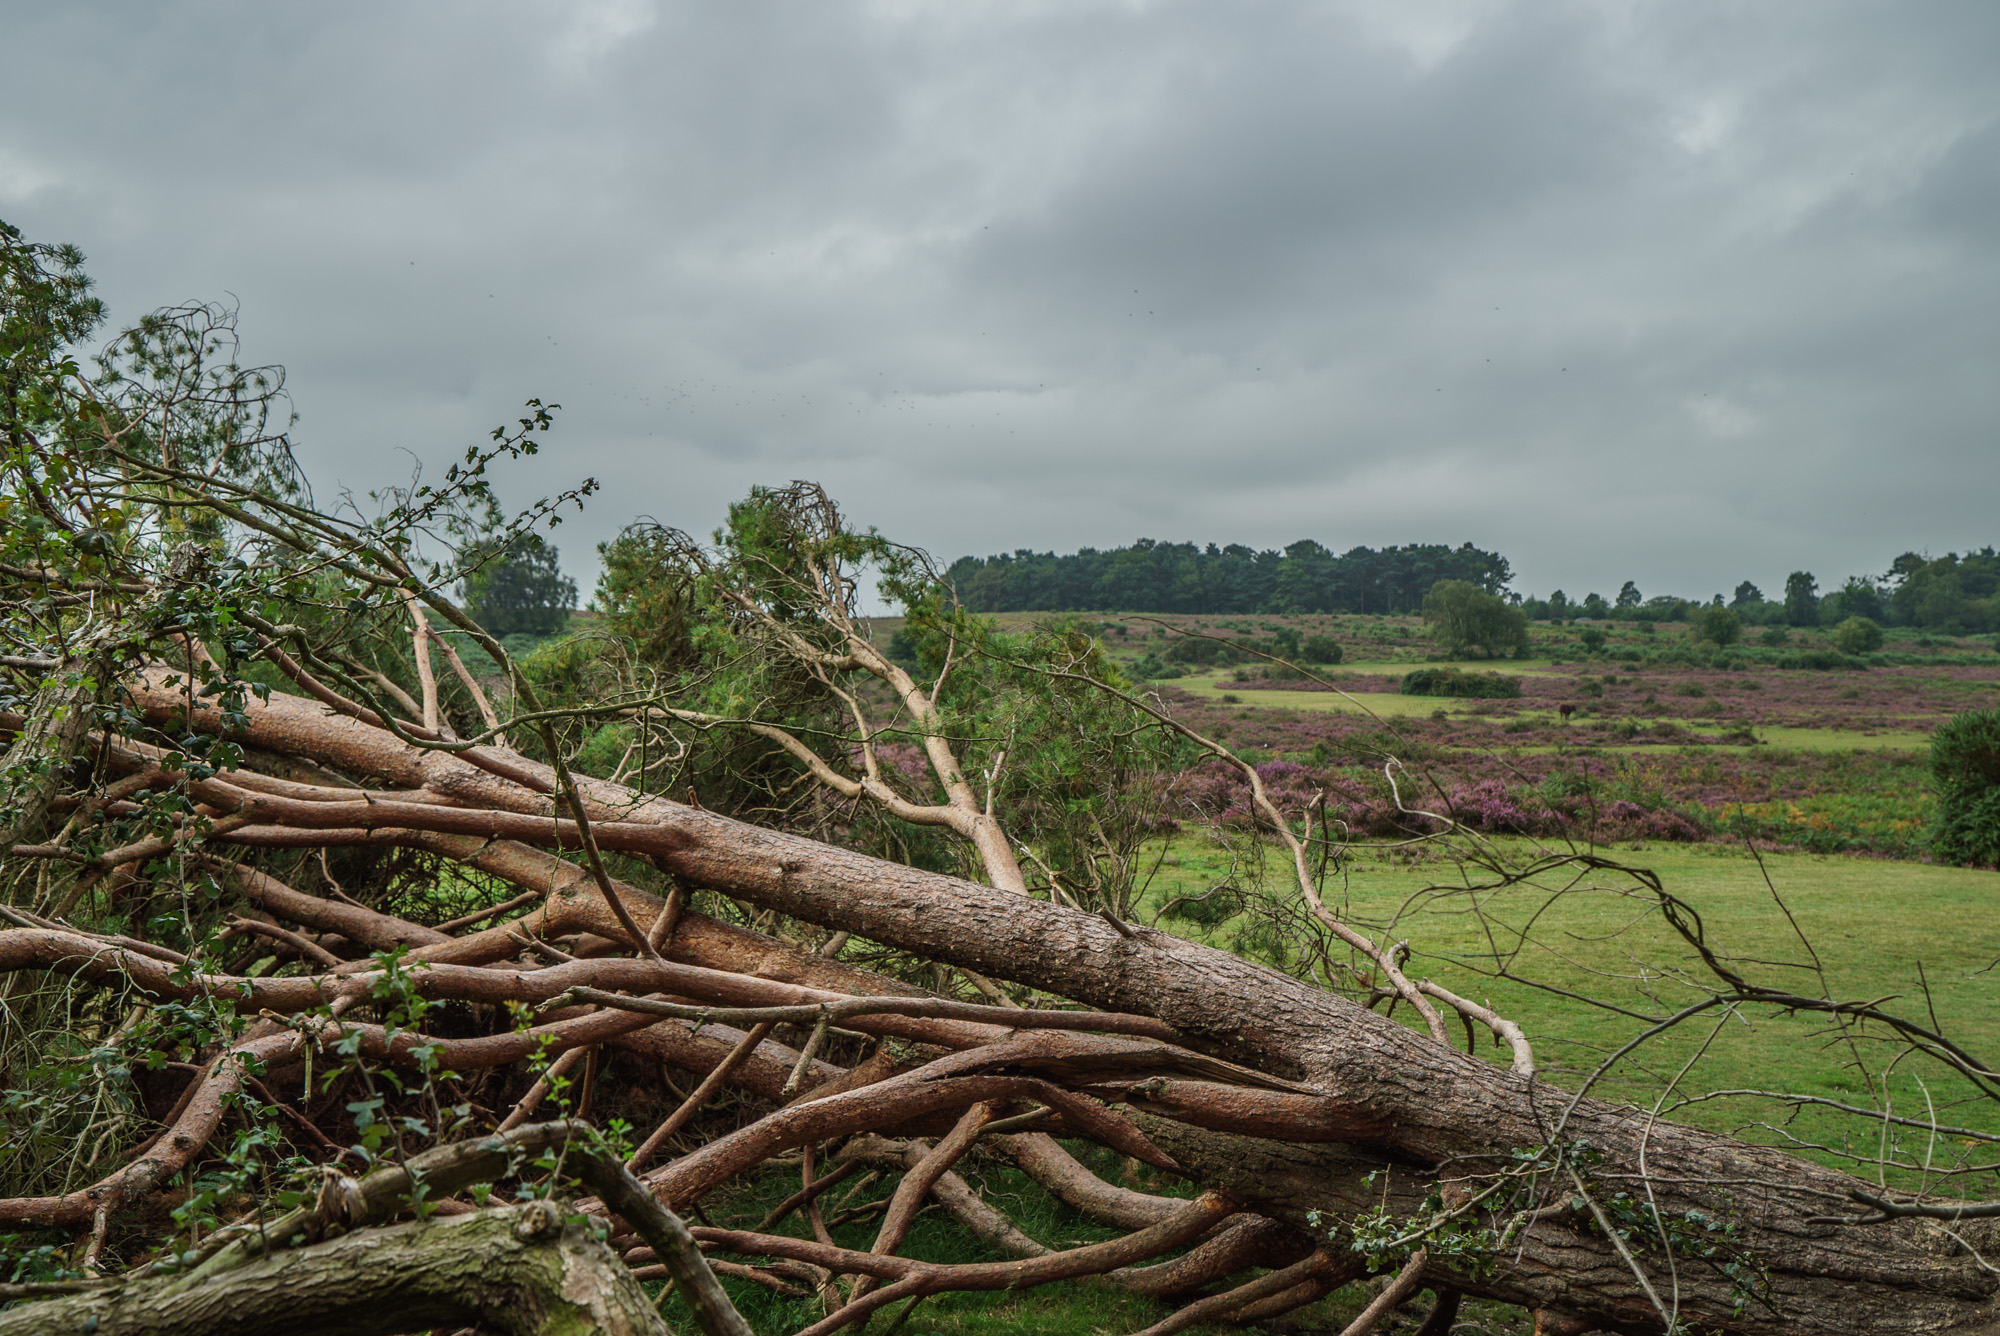
One of the main things I wanted to do was to bring out the texture and colour of the bark of the tree…. as well as enhance the colours to show the warmth of the bark…. and to show a bit more detail in the sky. As I said this was all done in Lightroom from a single exposure. I haven’t blended two or three photos, there is no HDR post processing just a single RAW file..
I still wanted to add a bit more drama in to the sky so I then edited the photograph in Photoshop using the Nik ColorEfex tools. This means that I can paint them in where I want them and mask out the areas that I don’t want to be changed. This does take a bit longer to do but it does mean that you can achieve the “look” to the final image that you want…
So, this is the same photograph after it has been edited in Photoshop..
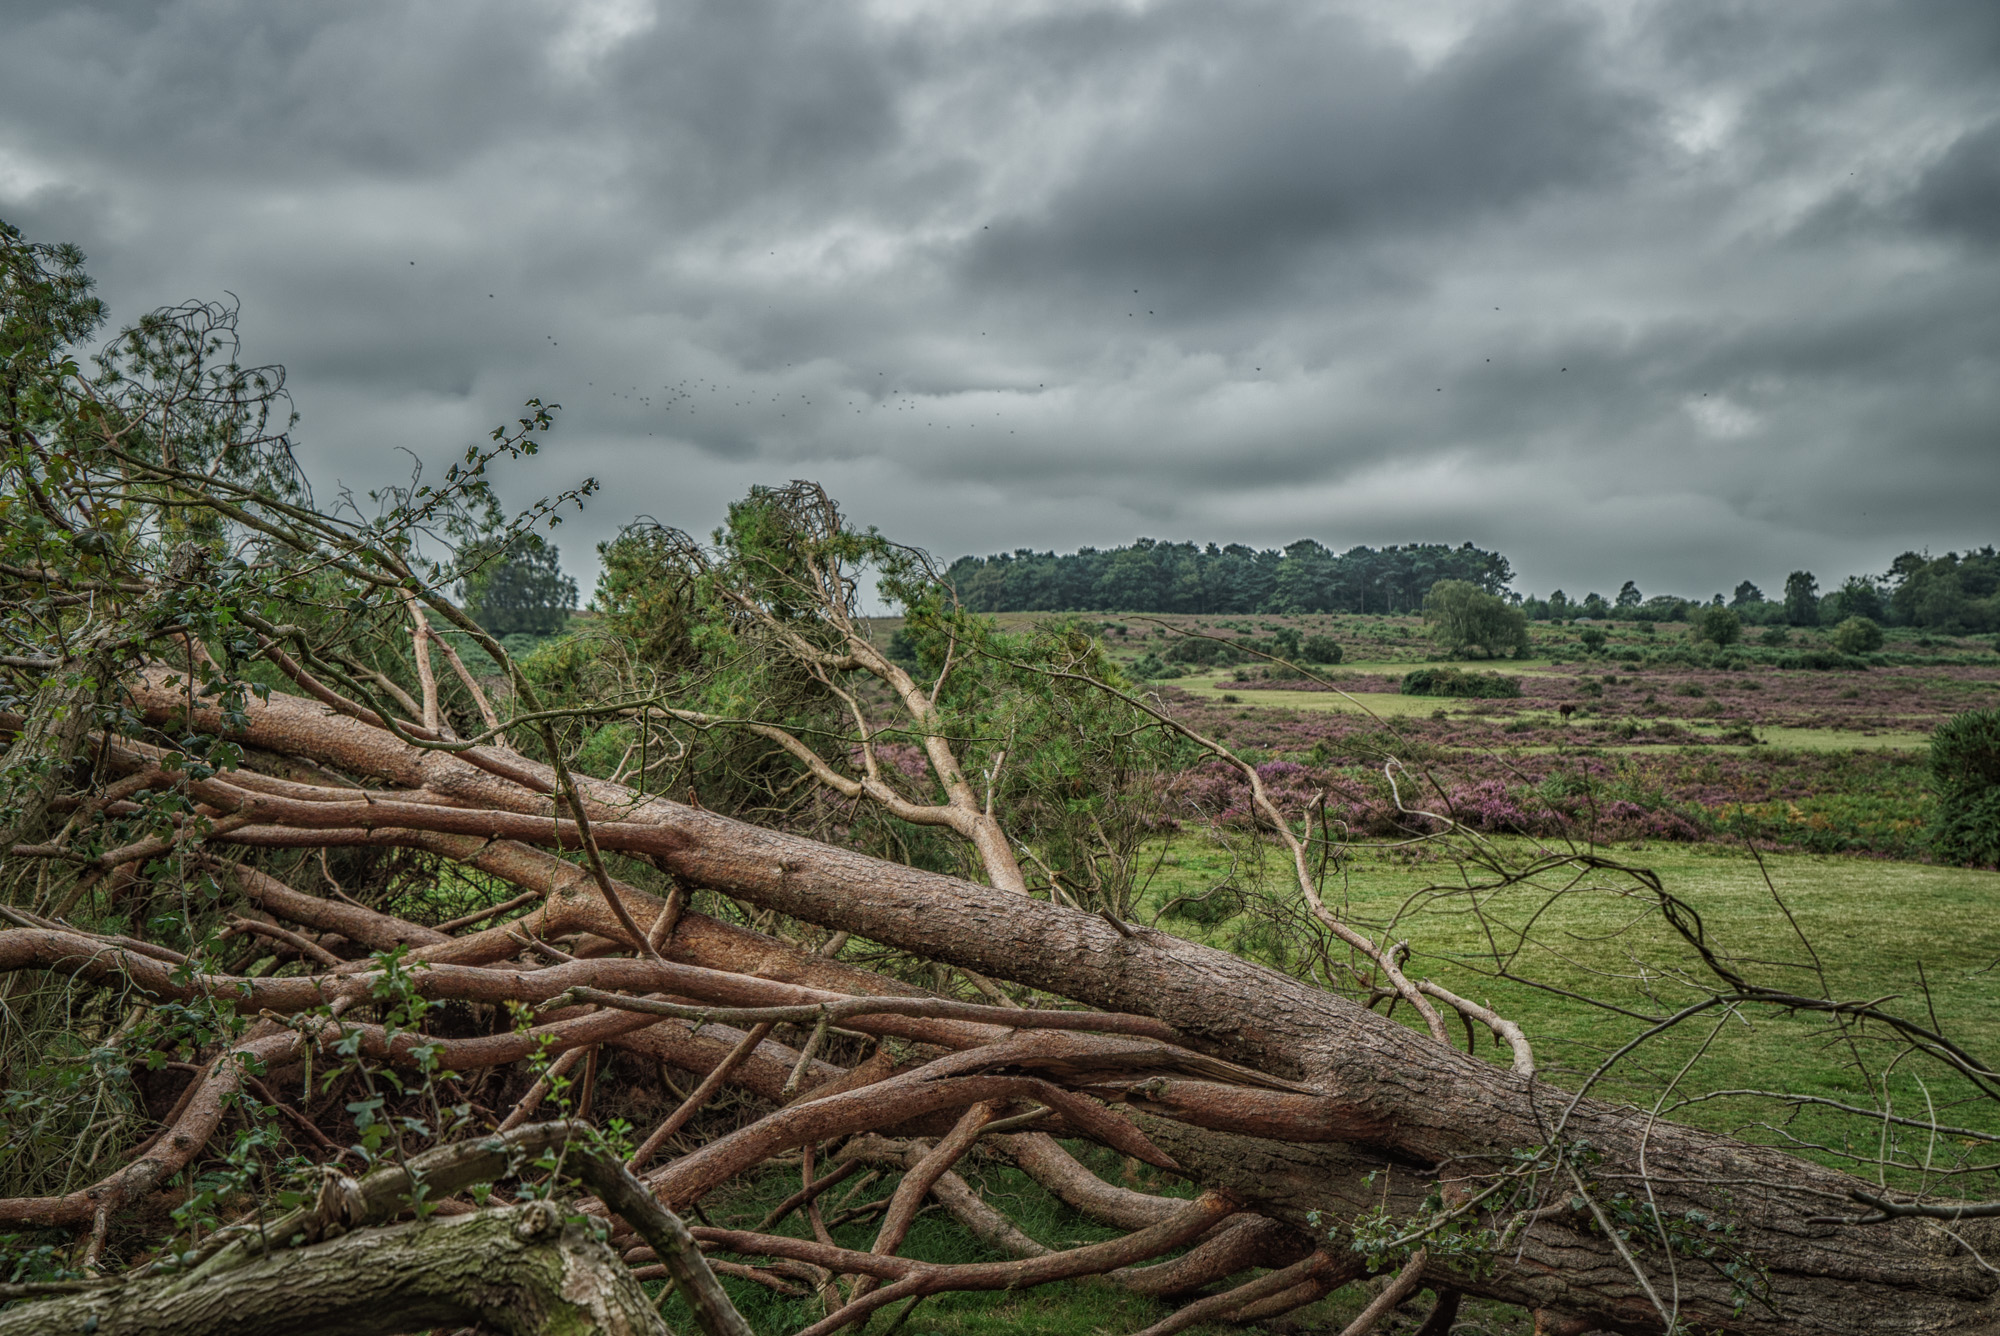
As you can see I’ve added some more drama in to the sky and this has also enhanced the flock of birds (albeit as rather small dots !) that happened to by flying past but were hardly visible in the original image.
It is still just a photograph of a fallen tree on the edge of a forest but I hope this has shown you some of the things that are possible in post processing. I think Lightroom is an amazing piece of software that many photographers do not use to its full potential….
One last thing, because I’m sure someone will ask…. This photo was taken with the Sony A7s with the 24-70 f4 FE lens ISO 200 f7.1 1/400s